If you’re running temperature & humidity environmental test chambers daily, you know one truth well:Expensive chambers, strict test standards, qualified samples — none matter if your chamber calibration is off.
♦
I’ve seen many labs follow generic calibration checklists, skip critical stabilization time, place sensors incorrectly, or calibrate only once a year… then end up with inconsistent test data, failed customer audits, and retesting costs piling up.
♦
This guide is written from real lab and field experience. I’ll walk you through practical standard calibration steps, realistic calibration cycles, common mistakes to avoid, and clear acceptance rules you can apply directly to your environmental chamber — no overly academic jargon, just actionable engineering know-how.
Why You Can’t Skip Environmental Chamber Calibration
Let’s cut to the point, real-world consequences:
-
Temperature or humidity drift leads to false pass/fail on product reliability tests
-
Non-calibrated chambers cannot pass ISO 17025, ISO 9001, or customer factory audits
-
Poor uniformity ruins repeatability; same product gets different results in the same chamber
-
Hidden sensor drift causes early equipment aging and unexpected downtime
-
For automotive, electronics, aerospace and medical components, uncalibrated test data is simply not acceptable for qualification
Calibration isn’t just routine maintenance — it’s the cheapest way to guarantee your entire reliability test program stays valid and credible.
Key Standards You Actually Need to Follow
No need to memorize dozens of documents; these are the ones engineers use daily for chamber calibration:
-
ASTM E2848: Core practice for environmental chamber temperature/humidity calibration
-
IEC 60068: Environmental testing baseline for electronic and electrical products
-
ISO 17025: Defines traceability and calibration lab competency for audit purposes
-
IEST-RP-CC006: Chamber temperature mapping guidelines
-
MIL-STD-810: Mandatory for defense and aerospace environmental qualification
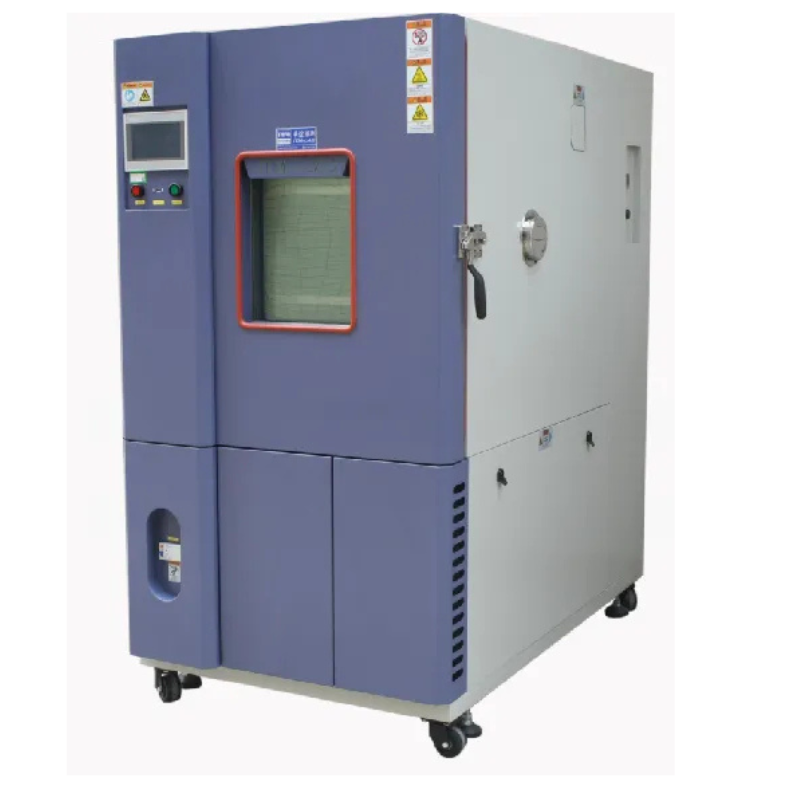
All ITM-LAB environmental test chambers are factory calibrated aligned with these standards, making on-site re-calibration much simpler for your team.
Practical Standard Calibration Step-by-Step (Engineer’s Field Version)
This is the actual workflow we use for regular chamber calibration — simplified, no fancy theory, just do it this way.
♦
Step 1: Pre-Calibration Preparation & Quick Inspection
First, don’t jump straight to placing sensors.
-
Empty the chamber completely: no samples, no fixtures inside during formal calibration
-
Check door seals, fan operation, heater and refrigeration system for abnormal noise or leakage
-
Make sure lab ambient stays stable: 15–35°C, moderate humidity, no direct air conditioning wind blowing to the chamber
-
Prepare NIST-traceable reference sensors:
Pt100 temperature probes (±0.1°C accuracy) and humidity sensors (±1%RH accuracy)
Pro engineer tip:Never use uncertified handheld meters for formal calibration — it will get rejected during audits.
♦
Step 2: Sensor Placement (9-Point Mapping Rule)
For standard bench-top and floor-standing chambers under 1m³, use the classic 9-point layout.
Place every probe at least 5cm away from walls, air outlets and door edges — avoid direct airflow impact, this is the most common mistake most new technicians make.
Positions:
Four corners, chamber center, middle of left/right/front/back walls.
For walk-in large chambers, extend to 15 or 27 mapping points to cover dead airflow zones.
♦
Step 3: Select Practical Calibration Set Points
Don’t calibrate random points. Choose 3 typical temperature levels and 2–3 humidity levels covering your real test range:
Pick the set points you actually use for product testing — no need to calibrate extreme ranges you never run.
♦
Step 4: Stabilize Before Recording Data (Don’t Skip This)
This is where many labs go wrong.
After setting each target condition,
let the chamber stabilize for 30 to 60 minutes.
Do not open the door during stabilization and data logging.
Only start recording when temperature and humidity stay steady with minor fluctuation.
♦
Step 5: Log Data Properly
Record both:
Log one set every 10–30 seconds, keep at least 30 valid records per set point. Consistent data sampling avoids accidental error.
♦
Step 6: Analyze Deviation & Judge Acceptance
Practical acceptance criteria engineers follow onsite:
-
Temperature deviation: within ±0.5°C for standard requirements
-
Humidity deviation: within ±3%RH
-
Check uniformity between all mapping points, not just the center point
If deviation exceeds the limit:
Adjust controller offset, check aging internal sensors, inspect fan speed and seal performance — then redo calibration after maintenance.
♦
Step 7: Document Everything for Audit
No calibration is valid without proper records.
Your report should include:
-
Chamber model, serial number, calibration date
-
Reference sensor certificate traceability
-
Sensor layout diagram
-
Raw data, deviation analysis, adjustment records
-
Next scheduled calibration date
Label the chamber with a calibration sticker — auditors check this first.
Recommended Calibration Cycle (Realistic for Different Industries)
Not all labs need the same frequency; here is the practical cycle we suggest based on industry usage:
| Industry / Usage |
Calibration Interval |
| General R&D internal testing |
12 months |
| Daily production QC testing |
6 months |
| Automotive / Aerospace / Medical |
3–6 months |
| After chamber relocation / major repair |
Calibrate immediately |
| Before critical product qualification test |
Calibrate in advance |
Extra practical advice:
Do a simple monthly spot check at the chamber center point with a calibrated portable meter. It helps you catch drift early without waiting for the full annual calibration.
In-House vs Third-Party Calibration: How to Choose
From an engineer’s perspective, here’s the straightforward comparison:
♦
In-House Calibration
Pros: Fast, flexible schedule, saves long-term outsourcing cost
Cons: Need trained staff and traceable reference sensors
♦
Third-Party ISO 17025 Calibration
Pros: Independent official certificate, audit-ready, no in-house workload
Cons: Higher cost, need to reserve downtime in advance
For medical, aerospace and customer-regulated projects, third-party calibration is almost mandatory. For regular R&D and QC, in-house calibration with standard procedures works perfectly.
Why ITM-LAB Chambers Are Easier for Long-Term Calibration
From years of manufacturing and after-sales experience, we designed our environmental test chambers with real lab operation in mind:
-
Factory pre-calibrated following ASTM & IEC standards
-
High-stability Pt100 sensors with low temperature drift over years
-
Simple built-in offset adjustment; no complicated programming needed for routine calibration
-
Every unit comes with complete factory calibration documents
-
Global technical support for on-site calibration and maintenance
If you want a chamber that stays accurate long-term and doesn’t give you calibration headaches, ITM-LAB models are built exactly for that purpose.
Conclusion
Calibrating an environmental test chamber isn’t just following a fixed checklist.
It’s about doing the right sensor placement, respecting stabilization time, using reasonable set points, and sticking to a regular cycle matching your industry requirements.
Get these basics right, and you’ll avoid inconsistent test data, audit failures, and unnecessary retesting costs.
If you’re looking for reliable, easy-to-calibrate environmental test chambers for your lab, explore our full product range here: